There hasn't been much response to the giveaway and I think I know why. I think I may have implied that there would be some payment for the images taken by Sarah.
Please note that this is not what I meant. The session is free and you will receive all images on a CD. No copyright or anything.
Sarah also edits photos to make sure that you are looking your best and to add a special something to your pics.
The Giveaway will end midnight on July 4th and currently there are only 2 people entered. The only thing you need to do to enter is leave me a comment saying what kind of photo session you would like.
To get to the giveaway click here
Happy entering :)
Thursday, June 30, 2011
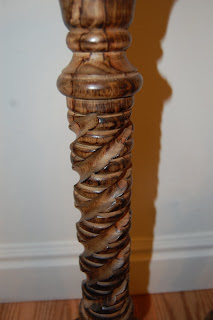
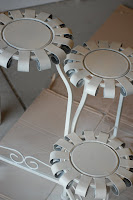
Candlesticks
I bought these candlesticks FOREVER ago and I love them. They have so much detail and are different from anything that I have ever seen.
The Problem is that they are kind of hum drum. They don't really match any room especially the room that they are currently sitting in which is the living room.
So what do I do with these lovelies? I really love them and don't want to get rid of them, so I am going to ask your opinion on what should be done...
I have thought about painting them white and then glazing them. Spraying them turquoise or a dark brown.

 What do you think?
The Problem is that they are kind of hum drum. They don't really match any room especially the room that they are currently sitting in which is the living room.
So what do I do with these lovelies? I really love them and don't want to get rid of them, so I am going to ask your opinion on what should be done...
I have thought about painting them white and then glazing them. Spraying them turquoise or a dark brown.


Tuesday, June 28, 2011
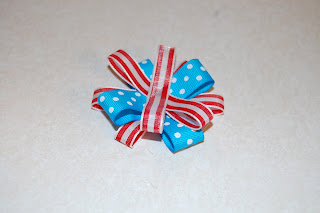
Fourth of July Hairbow Tutorial
I wanted to make a cute 4th of July hair bow for my cute little K-La girl.
I have only ever made one really simple type of hair bow before so this was a definite trial and error but it turned out okay.
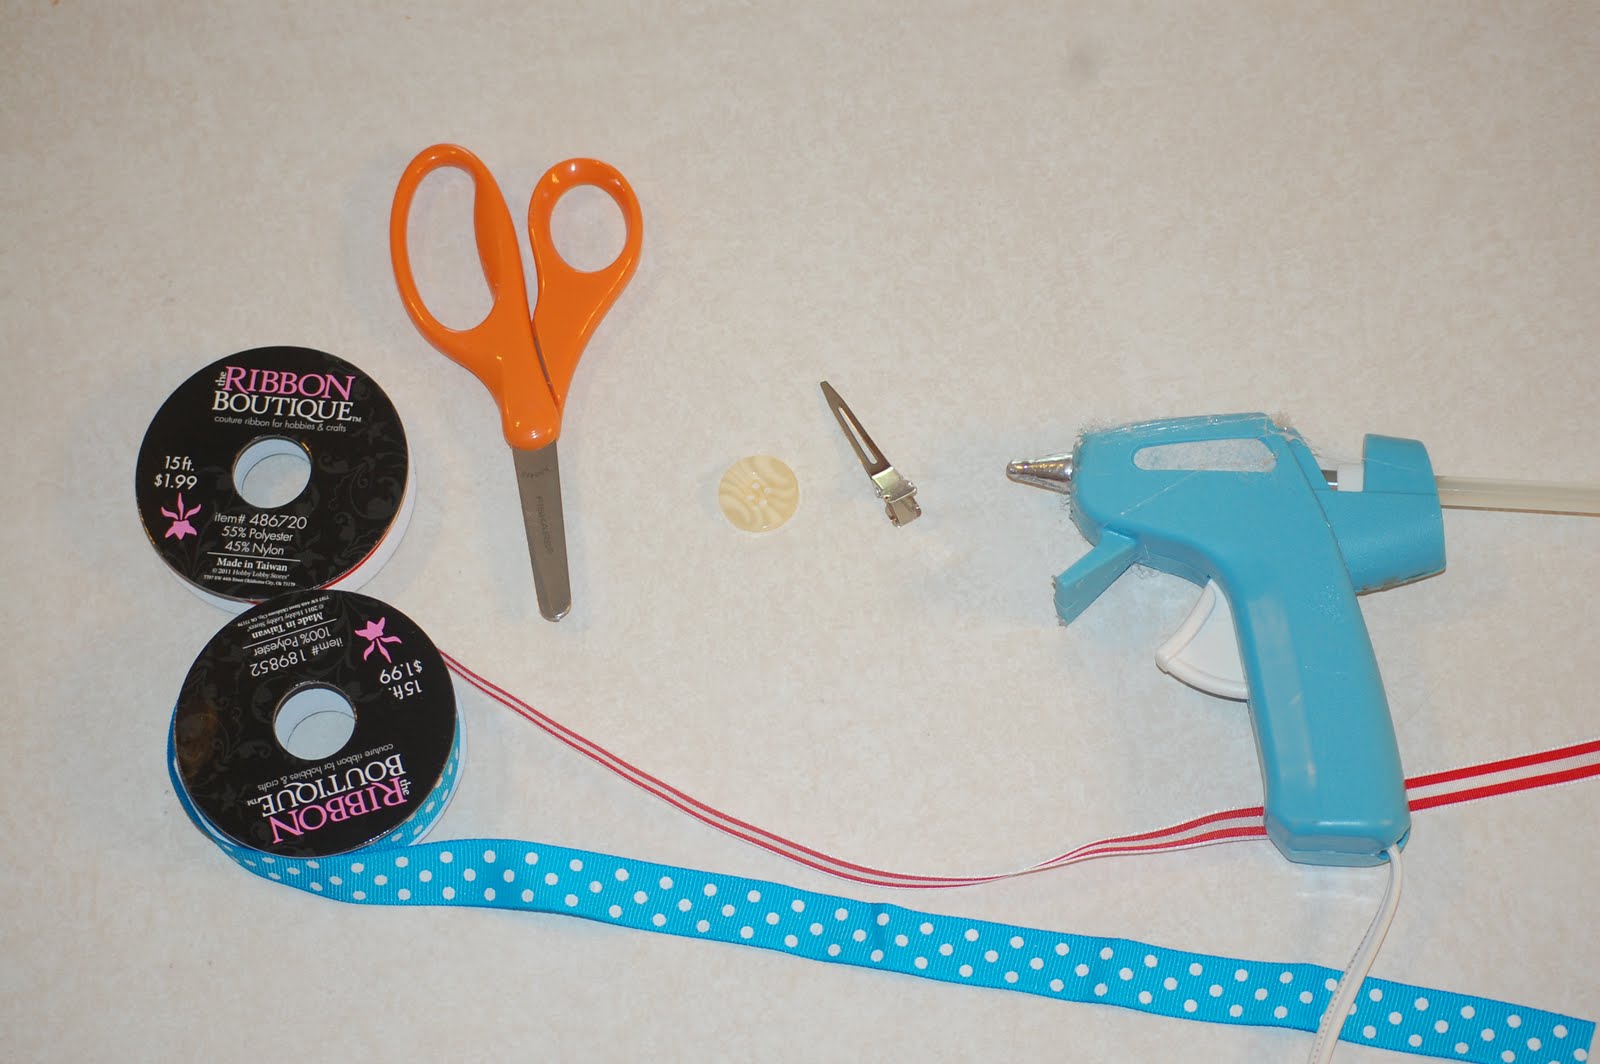
First off I gathered all of my supplies that I would need. I had 2 types of ribbon, a button, hot glue, scissors & an alligator clip.

The first thing that I did was to cut the ribbon to the sizes that I would need for the bow. I cut 2 lengths in the blue ribbon and 4 in the red and white ribbon. All of these were the same length. I also cut one more length of red & white ribbon to cover the clip.

The next step was to fold the lengths of ribbon in on themselves and glue them so they formed a ring.

The next step was to glue all of the rings in the middle so they laid flat.

They looked like this when they were all glued. Note just use a little dot of glue. Don't glue down the whole middle.

The next step was to decide on how each layer should look
I then glued them together making sure to always keep the ribbon seams down.

The fifth step was to glue the 2 layers together.
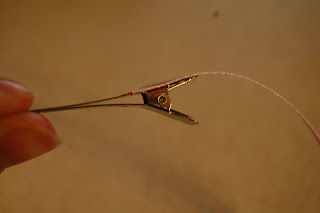
The next step was to get the alligator clip ready to be glued on to the base of the bow.
Here is a reminder of what to use for this.

Glue the ribbon on the flat side of the clip as shown.
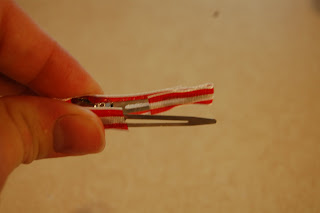
Hold the ribbon tight as you fold it around the clip and glue it to the top of the clip.

Continue to glue the ribbon down the rest of the clip keeping it open so you don't glue the 2 sides together and then tuck the ribbon under the clip and glue it down as well.
Flip the bow over and glue the alligator clip to the bow.

I just glued the clip to the lowest ribbon, which also happened to be the thicker ribbon.

Flip the bow back over and glue your button in the middle.

I liked the look of this so much that I made a larger one for my 11 year old niece.

Happy Fourth of July and happy bow making!
I have only ever made one really simple type of hair bow before so this was a definite trial and error but it turned out okay.
First off I gathered all of my supplies that I would need. I had 2 types of ribbon, a button, hot glue, scissors & an alligator clip.
The first thing that I did was to cut the ribbon to the sizes that I would need for the bow. I cut 2 lengths in the blue ribbon and 4 in the red and white ribbon. All of these were the same length. I also cut one more length of red & white ribbon to cover the clip.

The next step was to fold the lengths of ribbon in on themselves and glue them so they formed a ring.

The next step was to glue all of the rings in the middle so they laid flat.

They looked like this when they were all glued. Note just use a little dot of glue. Don't glue down the whole middle.

The next step was to decide on how each layer should look
I then glued them together making sure to always keep the ribbon seams down.

The fifth step was to glue the 2 layers together.

The next step was to get the alligator clip ready to be glued on to the base of the bow.
Here is a reminder of what to use for this.

Glue the ribbon on the flat side of the clip as shown.

Hold the ribbon tight as you fold it around the clip and glue it to the top of the clip.

Continue to glue the ribbon down the rest of the clip keeping it open so you don't glue the 2 sides together and then tuck the ribbon under the clip and glue it down as well.

Flip the bow over and glue the alligator clip to the bow.

I just glued the clip to the lowest ribbon, which also happened to be the thicker ribbon.

Flip the bow back over and glue your button in the middle.

I liked the look of this so much that I made a larger one for my 11 year old niece.

Happy Fourth of July and happy bow making!
Linked to:
http://www.myuncommonsliceofsuburbia.com
http://www.iheartnaptime.net/
http://www.fingerprintsonthefridge.com
http://spunkyjunky.blogspot.com/
http://tatertotsandjello.blogspot.com
http://www.skiptomylou.org
http://makingtheworldcuter.blogspot.com
http://www.tipjunkie.com
http://todayscreativeblog.net/
http://sewmuchado.blogspot.com/
http://www.morganandkari.com
http://www.handymancraftywoman.com/
http://organizeyourstuffnow.com/
http://nightowlcrafting.blogspot.com/
http://www.somewhatsimple.com
http://bec4-beyondthepicketfence.blogspot.com/
http://www.sugaranddots.com/
http://www.bacontimewiththehungryhypo.blogspot.com/
http://funkyjunkinteriors.blogspot.com/
http://notsosimplehousewife.blogspot.com/
http://www.iheartnaptime.net
Monday, June 27, 2011
Photography Giveaway
I have two beautiful sisters, they also both happen to be extremely talented. My older sister, Aimee can make anything. She sews, crafts...etc. Basically anything you ask her to do she can do it and she often makes up her own patterns. I will be doing a giveaway for some of her fun things at a later time.
Today's giveaway comes from baby sister Sarah.
She is an AwEsOmE photographer! Let me put my disclaimer in now. Sarah is not a professional. She just does this as a hobby because she absolutely loves capturing the little moments.
As she is not a pro her rates are pretty great. Don't let me sway you. I am not saying she is good because she is my sister. She really has talent in taking pictures and she is happy to be giving a free 1 hr. photo session to anyone either living in UT county or willing to come on down for the shoot.
This is open to any type of pictures that you would like to take. i.e engagements, family, self.....the only thing that it is not open for is wedding pics.
Here are some of my favorite moments that she has captured.


Anyway let the winning begin.
The giveaway will run until midnight July 4th and will be announced on Tuesday July 5th.
There is only 1rule to enter.You must leave a comment saying what kind of portrait you would want to have Sarah take for you.
The winner will be chosen by random.org.
Good Luck to all of you!!!
Today's giveaway comes from baby sister Sarah.
 |
| (Told you she was a beauty) |
She is an AwEsOmE photographer! Let me put my disclaimer in now. Sarah is not a professional. She just does this as a hobby because she absolutely loves capturing the little moments.
As she is not a pro her rates are pretty great. Don't let me sway you. I am not saying she is good because she is my sister. She really has talent in taking pictures and she is happy to be giving a free 1 hr. photo session to anyone either living in UT county or willing to come on down for the shoot.
This is open to any type of pictures that you would like to take. i.e engagements, family, self.....the only thing that it is not open for is wedding pics.
Here are some of my favorite moments that she has captured.


Anyway let the winning begin.
The giveaway will run until midnight July 4th and will be announced on Tuesday July 5th.
There is only 1rule to enter.You must leave a comment saying what kind of portrait you would want to have Sarah take for you.
The winner will be chosen by random.org.
Good Luck to all of you!!!
Wednesday, June 22, 2011
Girls Camp 2011
So I have been gone for a week because I was at Girls Camp with some of the most fabulous people that I know. I had an AWESOME time. We hiked delicate arch and went river rafting and had tons and tons of fun, plus some really good food.
I will post some pictures when I am able to get some. I forgot my camera so I will have to con someone into giving me some of their pics.
You will need to come back and check later this week though as I am going to be doing an awesome giveaway!
I will post some pictures when I am able to get some. I forgot my camera so I will have to con someone into giving me some of their pics.
You will need to come back and check later this week though as I am going to be doing an awesome giveaway!
Saturday, June 11, 2011
I LOVE Spring
Spring reminds me of so many things, but one of my very favorites are Lilacs.
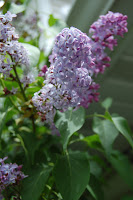
Growing up we had 2 HUGE lilac bushes in our yuard. The smell when you stepped outside was wonderful, luckily when the hubby and I bought our house there was a lilac bush growing just outside our back door.
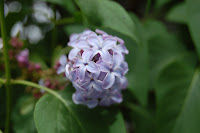
Every time I go in the backyard I get to smell the wonderful perfume coming off of that wonderful bush.
 I really wish someone somewhere could bottle this smell without making it smell old lady-ish.
Thursday, June 9, 2011
Leggy Lady Face-lift
Well she has just gotten the face-lift. I think that it may have been a botched job though... Needless to say I still haven't decided whether or not I like it.
I am pretty set in my colors that I like and this is a step outside the norm for me. I really think that is the whole problem with it. My husband really likes it and I think he has convinced me to keep it this way for at least a year.
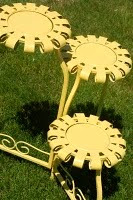
I do like that it adds a bit of sunshine to my porch.
Here she is getting primed. I prefer to do my spray painting outside so that the smell dissipates faster but it was super windy the day I primed her so here we are in my garage. I used Kilz spray primer (great primer, you should check it out)

I used Krylon's Bright Idea in gloss for the yellow color. To see her before click here
Do you see how well my herbs are growing?
 Who knew that I had a green thumb..
I think I will move the herbs to be on the steps and put flowers on the leggy lady though. I think that the herbs hide her and after all this work I want to show her off a little more.
I think that some pretty orange, red and yellow zinnias will be beautiful with her.
What do you think? Is it a botched job or do you like it?

I am pretty set in my colors that I like and this is a step outside the norm for me. I really think that is the whole problem with it. My husband really likes it and I think he has convinced me to keep it this way for at least a year.
I do like that it adds a bit of sunshine to my porch.

Here she is getting primed. I prefer to do my spray painting outside so that the smell dissipates faster but it was super windy the day I primed her so here we are in my garage. I used Kilz spray primer (great primer, you should check it out)

I used Krylon's Bright Idea in gloss for the yellow color. To see her before click here
Do you see how well my herbs are growing?
 Who knew that I had a green thumb..
I think I will move the herbs to be on the steps and put flowers on the leggy lady though. I think that the herbs hide her and after all this work I want to show her off a little more.
I think that some pretty orange, red and yellow zinnias will be beautiful with her.
What do you think? Is it a botched job or do you like it?
Linked to:
http://www.fingerprintsonthefridge.com/
http://bec4-beyondthepicketfence.blogspot.com/
http://www.somewhatsimple.com/
http://spunkyjunky.blogspot.com/
http://tatertotsandjello.blogspot.com/
http://funkyjunkinteriors.blogspot.com/
http://www.iheartnaptime.net
http://www.myuncommonsliceofsuburbia.com
http://www.fingerprintsonthefridge.com/
http://bec4-beyondthepicketfence.blogspot.com/
http://www.somewhatsimple.com/
http://spunkyjunky.blogspot.com/
http://tatertotsandjello.blogspot.com/
http://funkyjunkinteriors.blogspot.com/
http://www.iheartnaptime.net
http://www.myuncommonsliceofsuburbia.com
Thursday, June 2, 2011
Robot Cake for the G-Man
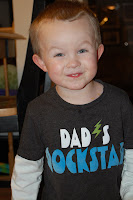
It was recently my little boy's birthday. His name is Garrett but we call him G-Man. I know what you are thinking..and yes he is the cutest little boy you have ever seen, yep he takes after his super cute daddy. I know, lucky me ;)
One day he and I sat down at the computer to look at the Betty Crocker Cake decorating website found here. He went NUTS looking at all of the cakes. They have a ton of how to videos. We had to watch almost each and every one including the barbie princess cake. One in particular caught his eye (glad it wasn't the barbie princess cake) and best of all it was one that I, an extremely impatient person could handle.
It was a Robot cake. To say that it was cute was a complete understatement. If I do say so myself I rocked at copying... this cake. To see the original click here.
How did mine turn out you ask...well take a gander and see for yourself.
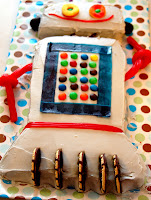 Okay Okay so I have spacing issues with the rollers (cookies) but eh...does it really matter to a 3 yr old?...nope.
I will say one thing for this cake is that you really need to take your time. In the videos they let you know that you need to chill the cake basically after every step. THIS IS A MUST.. the cake will crumble and so will you if you do not find a space in your fridge to keep it for a while.
The board that I put it on was super easy as well. I just took an old cardboard box, cut it to the right size and then I covered it in wrapping paper. Like I said Easy Peasy.
If you are interested in making this cake or any number of other ones just click on that linky above and it will tell you exactly how to do it. They also provide templates that can be printed out so that you don't even have to worry about figuring out how to cut the cake so that it turns out right.
Linked to:
http://www.somewhatsimple.com/
http://bec4-beyondthepicketfence.blogspot.com
http://www.fingerprintsonthefridge.com/
http://spunkyjunky.blogspot.com/
http://tatertotsandjello.blogspot.com
http://funkyjunkinteriors.blogspot.com/
http://www.myuncommonsliceofsuburbia.com/
http://bacontimewiththehungryhypo.blogspot.com
Subscribe to:
Posts (Atom)


